C3IM
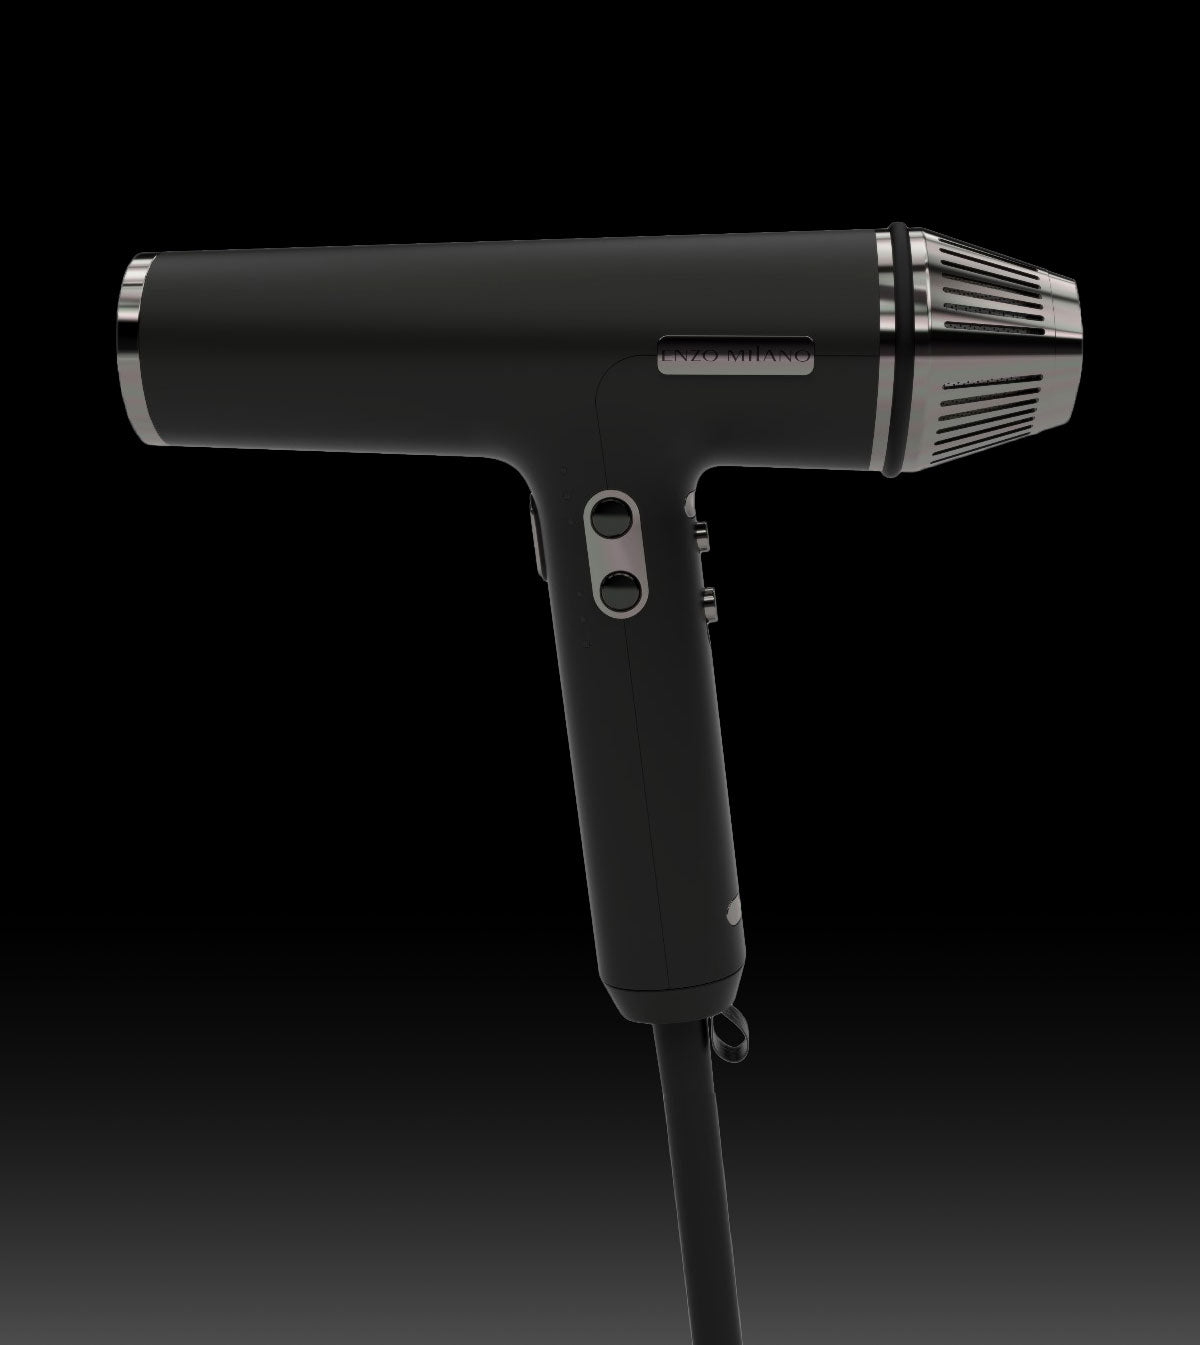
C3 - Ciclone 3 Vortex Professional Blow Dryer
Instruction Manual
Function layout

Directions of the parts
- ON/OFF & Lock button
- Temperature adjustment button
- Air speed adjustment button
- Control button
- Temperature indicator light RED LED
- Air speed indicator light WHITE LED
- Control indicator for sensor and clean notification
- Cold air button
- Filter
- Air inlet cover
- Hanging Loop
- Power cable
- Diffuser
- Wide nozzle
- Narrow nozzle
Technical Data:
Voltage: 110-125V~
Frequency: 60Hz
Power: 1,600-1,700W
Wind speed: 22m/h
Sound level: 78Db.
Weight: 380g
Extra flexible 10ft cable.
Controls ad Functions
Instructions
Verify Power Compatibility: Prior to use, ensure that the power supply matches the specifications indicated on the appliance. Plug into the Outlet: Insert the appliance’s plug into a compatible socket. Power On: Activate the appliance by pressing the ON/FF button (1). When you turn the appliance on for the first time, it will automatically default to the lowest speed and temperature setting. You can easily adjust the temperature and speed using the buttons (2) and (3). Operation Complete: After using it the appliance, power it off and unplug it from power source. Cool Down: Allow the appliance to cool down before storing it. Cleaning Convenience: The magnetic, removable filter basket is designed for easy removal and cleaning
Adjust the speed.
You can adjust the airspeed using the airspeed button (3) and LED WHITE indicator lights (5) as follows, simply press the button until you reach your desired speed:
- One white LED light indicates Low Speed
- Two white LED lights indicate Medium Speed.
- Three white LED lights indicate High Speed
Temperature settings
You can adjust the heat temperature using the Temperature button (2) and LED RED indicator lights (6) as follows, simply press the button until you reach your desired temperature:
- One red LED light indicates Low Heat
- Two red LED lights indicate Medium Heat.
- Three red LED lights indicate High Heat
Cold air button: Pressing the cold air button (8), will automatically switch the temperature to cool or no heat setting
Reverse clean function: To initiate the reverse clean function, press the sensor button (4) and simultaneously move the ON/OFF button to the “ON” position. The red light (7) with flash when this function is activated
Auto reverse clean function: When the dryer accumulates 8 hours of service time, the red light (7) will flash, serving as a reminder that it’s time for a cleaning. If cleaning is not performed, the dryer will enter emergency mode, operating with no heat and the lowest speed. To resolve this:
- Perform the Reverse Clean Function
- Clean both the inner filter and the air inlet cover. This maintenance step is essential to protect the service life of the motor
Sensor touch function: Switch Appliance to the unlock position (1) Press and hold the Control button (4) for 10sec to activate this function. A Blue light (7) indicator will signal when sensor function is activated. To deactivate this function: Repeat the same steps until the blue indicator turns off. The sensor function will then be turned off
Overheating protection: This dryer is equipped with RapidION thermostat + fuse to prevent overheating issues. When activated, both the temperature and the power will be reduced to ensure safety and prevent overheating problems.
Auto shut-off function: The dryer features an auto shut-off function, which activates after 2 hours of nonuse, even if the sensor is deactivated. This feature enhances safety and energy efficiency.
Lock function: With the exception of the cool-shot button, all other function buttons are disabled when the lock button (1) is activated. This feature ensures that the appliance’s settings remain unchanged during use.
Cleaning instructions: To begin, unplug the dryer from the outlet for safety. Remove the air inlet cover (10) Take out the filter (9) from inside the rear cover. Clean the filter it with a slightly damp towel or sponge ensuring it is completely dry before reassembling it. Proper maintenance of the filter can significantly extend the life of your dryer.
Step to clean the filter.
- Filter

Step 1: Unplug the power.
Step 2: remove the outer Cono filter. magnetic back cover of the dryer
Step 3 Remove the inner Cono Filter
Step 4: Use ENZObrush to clear all debris.
Step 4: Assemble and replace the cleaned inner and the outer cono filters
Safety
CAUTION: PLEASE READ CAREFULLY THE INSTRUCTIONS BEFORE USE.
MANUFACTURER’S INSTRUCTIONS MUST BE FOLLOWED CORRECTLY TO ENSURE THE SAFEST USE OF THIS DEVICE.
Safety tips:
- Keep the packaging (bags, boxes etc.) away from children. They may be hazardous if they play with them.
- Plug in this appliance, ensuring that the main voltage is the same as that indicated on the unit.
- NEVER touch the unit with wet or damp hands or feet.
- PREVENT the unit from coming into contact with water or other liquid. Do not use this appliance near baths, showers, sinks or any other object containing water.
WARNING: Do not use this device near baths, showers, sinks or any other object containing water.
- If the unit accidentally falls into water or any other liquid, DO NOT ATTEMPT TO PICK IT UP, immediately unplug it first.
- Do not use extension cords in rooms with baths or showers.
- If the device falls, check it before using it. It must be checked by qualified staff or by official after-sales service.
- When the hair dryer is used in a bathroom, unplug after use as the proximity to water presents danger even when the dryer is off.
- Do not pull the cord to unplug the appliance.
- Do not wrap the cord around the appliance.
- Never operate this appliance if the cord is damaged or if it is not working properly. Return the device to the manufacturer or to a delegated customer service representative.
- This appliance is not intended for use by persons with physical, sensory or mental disability (including children), or by persons who lack experience or knowledge, unless under the supervision or have received instruction on how to use the appliance by a person responsible for their wellbeing. Children should be supervised to avoid playing with the appliance.
- To avoid overheating, do not leave the appliance plugged in. Always switch off the unit after use by unplugging it.
- Do not use sprays (hairspray) near the dryer while it is in use.
- Do not leave while the appliance is still in operation.
- In order to avoid burning, keep the hot parts of the appliance away from heat sensitive surfaces and skin.
- Do not cover the dryer with towels or other objects while in use or still hot.
- NEVER store the appliance while still hot or plugged.
- ALWAYS prevent the cable to enter into contact with hot parts of the unit, even when it is unplugged.
- Do not obstruct the air intake. Check regularly that it is clean and free of hair.
- For additional protection, we recommend installing a residual current device (RCD) with a rated operating fault current not exceeding 30 mA in the electrical circuit supplying the bathroom. Ask your installer for advice.
- WARNING: If the device is used in a way not specified by the manufacturer, safety may be compromised.
SAVE THESE INSTRUCTIONS MAINTENANCE STORAGE
When not in use, your appliance is easy to store. Allow unit to cool, then simply put back in the box, and store out of reach of children in safe, dry location. Do not jerk or strain cord at plug connections.
CLEANING
Keep all vents and openings clear of dirt and dust. If cleaning becomes necessary, disconnect the unit from the power source, and wipe exterior with a damp cloth. If any abnormal condition occurs, unplug the unit, allow it to cool, and return it for repair to an authorized service representative only. No repairs should be attempted by the consumer.
ENZO Milano: ENZOcare 12-Month Warranty
Coverage: ENZO Milano extends this 12-Month Warranty to the original end-use purchaser of selected ENZO Milano products or gift recipients, provided the ENZO Milano Product was purchased from an Authorized Dealer.
Definitions:
- Authorized Dealer: Distributors, resellers, or retailers authorized by ENZO Milano to sell authentic products, in new, unused condition.
Scope:
- Provides a 12-Month Warranty against Manufacturing Defects.
- If an ENZO product contains a Manufacturing Defect:
- Warranty Credit for the product on the ENZO Milano online store.
- Amount equals the purchase price from ENZO Milano or an Authorized Dealer.
- ENZO Milano may inspect the product to determine if the defect is a Manufacturing Defect.
- For non-Manufacturing Defects, refer to ENZOcare+ Coverages.
- ENZOcare+ Deductible may be used toward Replacement.
- Availability of exact replacements not guaranteed.
Limitations: ENZO Milano does not assume liability for any incidental, consequential, or indirect damages under this warranty.
ENZO Milano: ENZOcare+ Product Insurance Policy
At ENZO Milano, we provide additional protection for your ENZO Milano products beyond the ENZOcare 12-month warranty.
Coverage: ENZOcare+ covers:
- Accidental Damage, including drops and spills.
- Loss, due to misplacement.
- Theft of your ENZO product.
Deductible:
- Fixed deductible of 30% of MSRP for each claim.
- Deductible is deducted from the replacement cost.
Process Fee:
- First Claim: $10.00 standard process fee.
- Subsequent Claims based on your product (details on enzoMilano.com > ENZOcare+).
- Process fee may vary based on the reason for your claim.
Filing a Claim:
- Go to EnzoMilano.com > ENZOcare.
- Provide proof of purchase and a detailed incident description.
Coverage Duration: ENZOcare+ coverage is available during and after your ENZOcare 12-month coverage.
Exclusions: Review policy documents for coverage limitations and exclusions.
Contact Information: For questions or assistance, contact ENZOcare@enzomilano.com.


